

Welcome to the enchanting realm of Diamond Painting, a soothing and artistic pastime that transforms small resin diamonds into stunning works of art. Whether you are embarking on your first kit or seeking to enhance your skills, this Beginner’s Guide To Diamond Painting will provide you with all the essential information, along with valuable tips to ensure your creation truly stands out.
🎨 What’s in Your Kit?

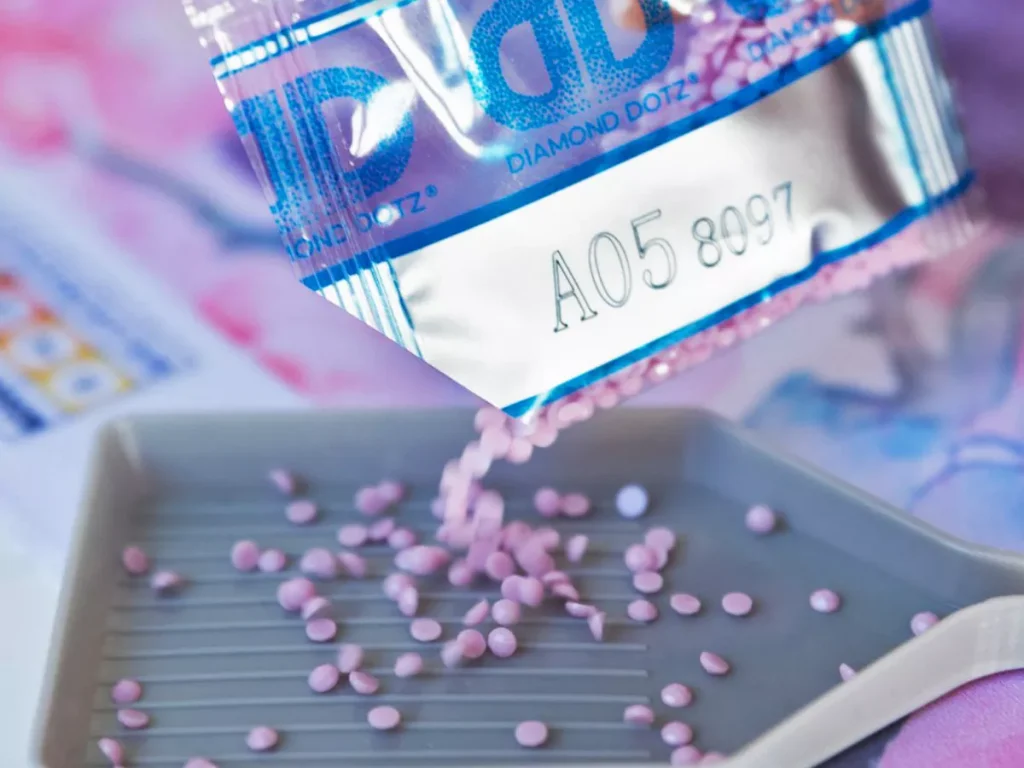
Before we begin, let’s check what comes in a standard diamond painting kit:
- Adhesive canvas (pre-printed with your design and symbols)
- Color-coded resin diamonds
- Applicator pen
- Wax pad
- Tray
Pro Tip: Keep the diamonds organized small containers or zip-lock bags labeled with their codes will save you so much time.
🎯Ready to get started? Here’s a Beginner’s Guide To Diamond Painting to help you create your masterpiece.
✨ Step 1: Prepare Your Workspace

Firstly, choose a neat, even, and brightly lit workspace. Make sure that it is a place where you can keep your project set up between sessions. If required, unroll your canvas and place a heavy object on the corners to help it lie flat.
🗺️ Step 2: Understand the Symbols

Secondly, on your canvas there is a chart similar to a cross-stitch design, which pairs symbols with colors, often indicated by DMC codes. Connect each symbol to the appropriate diamonds.
Tip: To make things easier and cleaner, start from one corner many prefer the bottom right if you’re right-handed and work in small sections to avoid smudging the adhesive.
💎 Step 3: Apply the Diamonds
1.Pour some diamonds into the tray and gently shake side to side so they flip right side up.
2.Press the pen into the wax pad to pick up wax.

3.Tap the diamond’s top with your pen, and place it on the matching symbol on the canvas.

So, repeat row by row. It’s super satisfying!
🧼 Step 4: Beginner’s Guide To Diamond Painting Canvas Care

Cover the unused parts of your canvas with the clear plastic sheet or parchment paper to protect the adhesive. If stickiness fades, gently dab with a baby wipe and let dry.
✅ Step 5: Beginner’s Guide to Diamond Painting to Finish Your Artwork
Once complete:

- Place a protective sheet (like parchment paper) over the canvas
- Use a diamond painting roller to gently press over the entire surface this helps the diamonds stick firmly to the adhesive.
- Frame it behind glass, or seal it with a diamond painting sealer
Boom. Your shiny masterpiece is ready to glow on your wall.
💡 Extra Tips for a Flawless Finish:
- Use a light pad under the canvas to make symbols pop.
- Take breaks this is meant to be relaxing, not rushed.
- Don’t panic if you drop diamonds in fact, a lint roller works wonders for picking them up quickly.
- For an even more relaxing experience, play some music or a podcast in the background it makes the process feel like true “me time.

🌟 Final Thoughts
Diamond painting transcends being merely a hobby in fact, it serves as a therapeutic experience adorned with sparkle. With each diamond you place, your creation comes alive a little more. Whether you’re working on a vibrant seascape or a cozy cottage scene, it’s about the journey, not just the final piece. So next time you unwind, brew yourself a comforting cup of tea, hit play on your go-to playlist, and savor every shimmering moment.